How to Install a Bathroom Sink Drain: Step-by-Step Guide

Sink drains might not be the most glamorous part of your bathroom sink, but they’re definitely one of the essential components. Installing a new faucet with a matching sink drain is a minor update that gives your bathroom or kitchen a nice boost.
Moreover, learning how to install a sink drain is an easy, money-saving DIY project for homeowners. Follow these step-by-step directions to install your new drain. You'll enjoy a leak-free sink with a drain that complements the rest of the fixtures in the room.
Tools and Materials Needed to Install a New Sink Drain

While installing a bathroom or kitchen sink drain is a relatively easy DIY project for homeowners, it’s important that you have the right tools and materials to ensure that the job goes smoothly. Before you begin the project, assemble the following items:
- P-trap
- Adaptor
- Sink drain pop-up assembly
- Clevis & pivot rod, if not included with assembly
- Bucket or container to catch wastewater
- Silicone sealant
- Plumber’s Epoxy Putty
- Slip joint pliers
Once you've assembled your tools and materials, you're ready to begin the sink drain installation. Before you start, you'll want to put the container under your sink to catch any water that might be sitting in the P-trap.
How to Install a New Bathroom Sink Drain in 9 Easy Steps
1. Remove the Clevis and Pivot Rod

Most faucets come with a matching drain plug, but if you are replacing your sink drain only, you may need to look for a sink drain pop-up assembly in a style and color that complements your existing hardware.
To remove the pop-up drain and drain assembly, look for the flat metal rod beneath the sink. The clevis rod has several holes and connects the sink drain to the pivot rod, plugging and unplugging the drain. To remove it, unscrew the nut holding the pivot rod to the sink drain, using pliers as necessary. Once you've removed the pivot rod, you should be able to remove the drain plug from the top of the sink.
2. Remove the P-Trap

The next step to replacing the sink drain is to remove the P-Trap. The P-Trap is the gooseneck-like pipe that sits underneath the sink. Most of us think the P-Trap is in place in case you drop something small down the drain (like a ring). But the P-Trap is also protective because the shape prevents pipe gases like methane from entering your home.
When you remove the P-Trap, there will likely be some debris and water that will drain out into the bucket. Keep in mind that you will need to unscrew the P-Trap in two places—under the drain and near the wall. You may need to use pliers to unscrew the P-Trap and remove it.
3. Unscrew and Disconnect the Drain Flange

Using your pliers, unscrew and disconnect the drain flange or drain body. The drain flange is the visible part of the drain—usually running around the edge. Some drains have a grid section covering the hole (older sinks typically feature only the pop-up assembly).
There is often a rubber gasket around the drain. Remove this piece and keep it handy once you reassemble the sink. You may want to inspect the gasket to ensure it's in good condition; otherwise, you may need to replace the gasket as well.
4. Clean up the Drain and Sink

Once you've removed the drain components, you should be able to lift the drain from the sink. You may notice residue around the drain, including plumber's putty. Now that you've removed all the old hardware, clean up the drain, sink, and faucet. Be sure to remove any dirt, grime, or old sealant left behind—this will ensure that your new sink drain looks great and that you get a tight seal to prevent leaks.
6. Insert the New Drain and Secure

Next, it's time to insert the new drain into the sink's hole. You'll want to put the drain piece into the hole, making sure that the flange is securely placed into the plumber's putty. If you are using a kit assembly, follow all instructions to ensure you get a good fit with a nice, secure seal around the drain. This will ensure that you don't run into future leaks.
7. Install the New P-Trap and Attach the Clevis

Next, you'll need to install the new P-Trap and attach the clevis and pivot rod. The clevis and pivot rod often last a long time, so if the components you removed still appear in good condition, you can reuse them. Start with the P-Trap. You'll attach the slip-nut to the P-Trap and then connect it to your current line and drain. Apply ABS Plumber's cement or silicone to create a tight waterproof seal.
Take care to avoid overtightening the connections, which can cause wear and tear, causing them to crack and eventually leak.
8. Attach the Pivot Rod to the Drain

Next, connect the pivot rod to the drain and clevis. Finish by attaching the clevis to the faucet behind the water line. Since the clevis and pivot control the stopper, you'll want to ensure that they're connected and working properly so your sink will stop as needed. If you are also installing a faucet, you'll want to reconnect the waterline and ensure that everything is sealed.
9. Check for Leaks

Once you’re ready to test the new sink drain, place a bucket below your sink and slowly turn on the water. Check for any leaks so you can address them right away.
How Much Does it Cost to Install a Bathroom Sink Drain?

Many homeowners are hesitant to tackle small plumbing projects like installing a new sink faucet or drain, but the truth is, with the right kit and instructions, there's nothing to fear. You will save significant money by installing a new sink drain yourself without hiring a plumber.
For most of the components, you will need to install a new bathroom sink drain, you’re looking at an estimated cost of around $50-$65. A professional plumber typically charges between $100-150 for a drain replacement.
But that cost doesn't include any minimum visit and labor charges that are included in calling a plumber. Most plumbers charge approximately $45 to $150 per hour for labor. Some plumbers also charge a minimum call fee, meaning a minor repair like a sink drain could still cost around $350.
If you're willing to tacking installing a bathroom sink drain yourself, it can be a great way to learn something new and save money on a small home repair.
How Long Does It Take to Install a New Bathroom Sink Drain?

It depends on your experience and comfort levels with tackling DIY bathroom home repairs. You're likely looking at 3-4 hours of work for a new sink drain.
How to Replace a Bathroom Faucet with Your New Sink Drain

Many people install a new sink drain while replacing the faucet. This is a great idea, especially if your new faucet is a different color or type of metal than the drain in your sink. Ensuring a matching faucet and drain will keep the bathroom fixtures consistent and cohesive.
Whether you're fixing a drain or installing a new drain in a sink, the fixtures should match. It gives the sink a clean look and allows you to check for any water damage in the cabinets and detect other problems you may need to address with your bathroom update.
By DIYing your bathroom faucet and sink drain installation, you’ll save time, energy, and money down the road. Most sink faucet installation kits are simple to follow with easy, clear instructions. If you’re wondering how to get started, check out the DIY faucet replacement video below.
If you’re looking for a beautiful faucet to match your new bathroom sink drain, don’t miss our wide range of bathroom faucets and fixtures. At Do It Best, we have everything you need to create a beautiful bathroom update that you’ll feel proud of.
While do-it-yourself projects can be fun and fulfilling, there is always a potential for personal injury or property damage. We strongly suggest that any project beyond your abilities be left to licensed professionals such as electricians, plumbers, and carpenters. Any action you take upon the information on this website is strictly at your own risk, and we assume no responsibility or liability for the contents of this article.
Related Articles
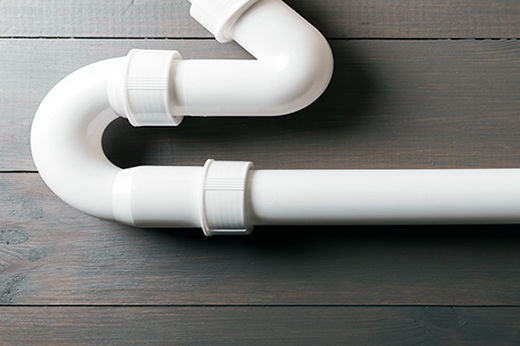
How to Clear a Clogged Pipe
Simple and affordable DIY tips for dealing with those backed-up drains
Learn more
Garbage Disposal Buying Guide
There's a few things you need to keep in mind before adding this to your kitchen
Learn more
How to Install French Drains
Follow these simple and affordable steps for removing standing water in your yard
Learn more
Bathroom Renovations: 7 Tips and Mistakes to Avoid
Helpful tips to follow, plus mistakes to avoid when remodeling
Learn more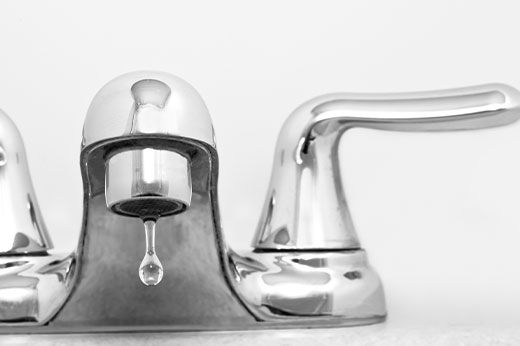
What Causes a Leaky Faucet: Common Causes and Fixes for Drips
Stop those irritating drips with these easy, cost-effective DIY fixes
Learn more